I’m here with a simple, step-by-step guide to help people export their Track Ratings and save them as actual metadata in their files.
This is mainly useful for those of us using local media libraries, since the track ratings are stored only in the app’s data. (Symfonium does not write anything to your files.)
I will be using a Windows PC with the free software Mp3tag to write the ratings to the tracks’ metadata. If you are using a different OS, you can look for other tag editors (such as Kid3), which should have similar features.
1) Filtering your Library by User Rating
Expand
The first step on our journey is to make a bunch of Smart Playlists! You’ll need a separate playlist for every rating step (e.g. 2 stars, 2.5 stars, 3 stars, etc.) It’s a little tedious to get them all created, but it’s the most straightforward way to reach our goal.
Playlist Setup
Simply create a new Track-based Smart Playlist and add a User Rating rule, like so:

There are a few important things to note here:
-
Make sure to select “USER Rating” for the filter, not the standard “Rating”
-
Values range from 0 to 10, with every half-star equal to 1. (So for a 2-star User Rating, you want this set to 4. Whereas for 2.5-stars, you’d want this set to 5.) You can skip 0 since those tracks have no user rating set.
-
Selected provider / libraries – I recommend setting this to Inherit. This allows you to use the Source Filter menu to exclude any folders that you aren’t working with.
-
Max item count should be left empty, so that the list includes all tracks that match your filter
When you’re done, you should have ten new Smart Playlists! Congrats, the hardest part of the job is done.
Feel free to set these playlists to Hidden if you don’t want them cluttering your Playlists screen. (Can be set in the 3-dots menu, inside each playlist.)
2) Exporting your Ratings
Expand
Only start this step once you are ready to export your Track Ratings!
The trick here is that we don’t want to export the Smart Playlists that we just made.
Some of you are probably yelling, “Well, what did I just do all of that work for?!” The Smart Playlists are important because they are always up-to-date. Every time you rate a track, it will immediately show up in these Smart Playlists. But we can’t use the Smart Playlists directly because they are basically just a bunch of instructions. They tell Symfonium “look for songs that match these filters” but they don’t remember which songs should be in the list.
Taking a snapshot
To save a list of which songs are in a Smart Playlist, we need to copy that Smart Playlist into a normal playlist. We can then export the new “dumb” playlists.
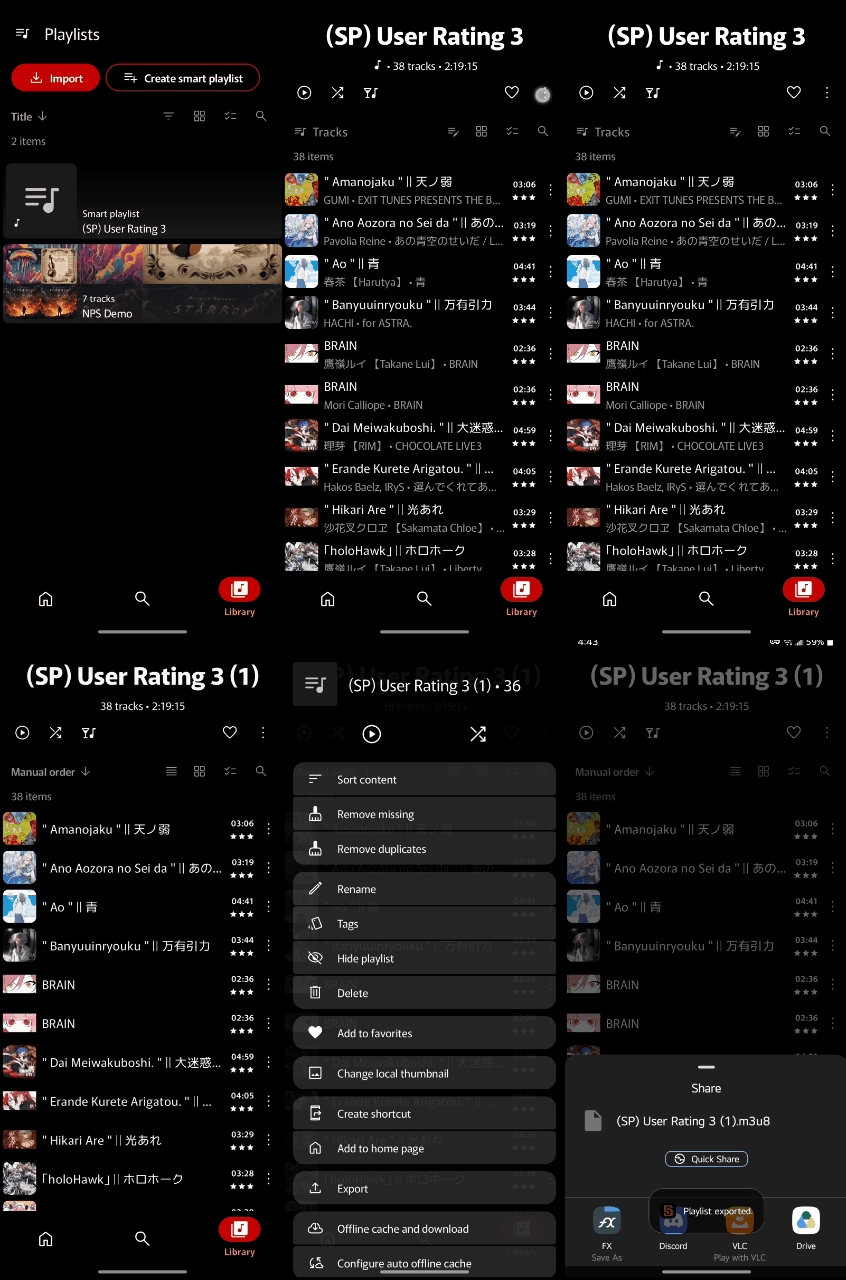
Written Steps
-
Open one of the Smart Playlists that we made earlier
-
Tap the 3-dots menu button
-
Select “Copy as normal playlist”
This will create a new “dumb” playlist. Be sure to return to the main Playlists screen and select this new playlist! It should have the same name but with an extra number at the end, like “My Playlist (1)”
-
Open the non-Smart playlist we just made
-
Tap the 3-dots menu button
-
Tap “Export”
-
Repeat for all of the other Smart Playlists
You don’t actually need to do anything on the Export screen. Just opening that menu is enough. The “dumb” playlist has now done its job and you can safely delete it.
Once you’re done tapping Export for all of the playlists, we can save the files all together. Simply navigate to Settings → Manage generated files and click the download button for each playlist. This should save them all to your device’s Downloads folder.


Make sure they are all m3u or m3u8 files! (If any of them are symspl files, that means you exported the Smart Playlist instead of the normal one.)
You should now have an *.m3u8 playlist file for each rating!
3) Updating your tracks’ metadata
Expand
Setting up your files
The first thing you’ll need to do is to place the *.m3u8 files from Step 2 into the same parent folder as your music library. I will be working with the copy of my music stored on my PC, rather than the files stored directly on my phone. (For no particular reason. Either way is fine, probably.)
The *.m3u8 files are just fancy *.txt files, so we can open them up with any text editor. Right-click the file, select “Open with”, and then choose “Notepad”. Here’s an example of what you will see inside:
#EXTM3U
#EXTINF:186,
YT Library/Some other folder/My song.mp3
That last line is the only part we need to look at. It shows us two things:
- The *.m3u8 file needs to be placed in the same parent folder as “YT Library”. (Your folder names will, of course, be different from mine.) My folder ends up looking like this:
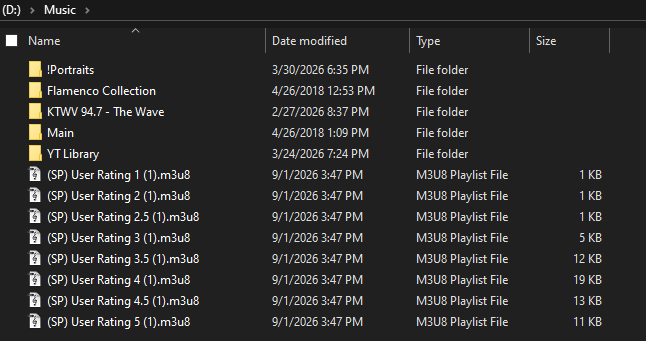
- The path to that music file needs to match exactly. You can edit the path directly in the text editor, if needed.
If, for example, my *.m3u8 read Music/YT Library/Some other folder/My song.mp3, then I would need to move them all outside of the “Music” folder. Or I could just delete Music/ from the start of every path. (“Find and Replace” function makes this easy.)
Updating the metadata
Now we can go ahead and load up Mp3tag. Navigate to File → Load Playlist/Cuesheet
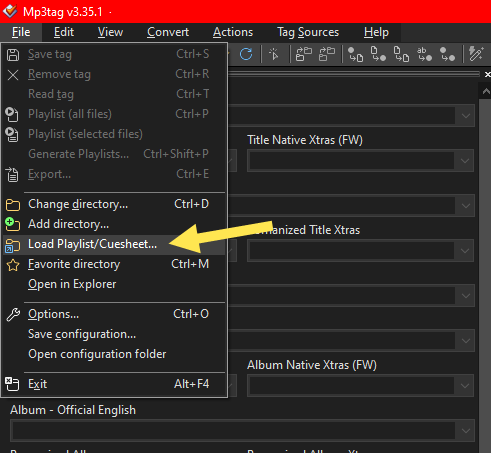
Select one of your *.m3u8 files:
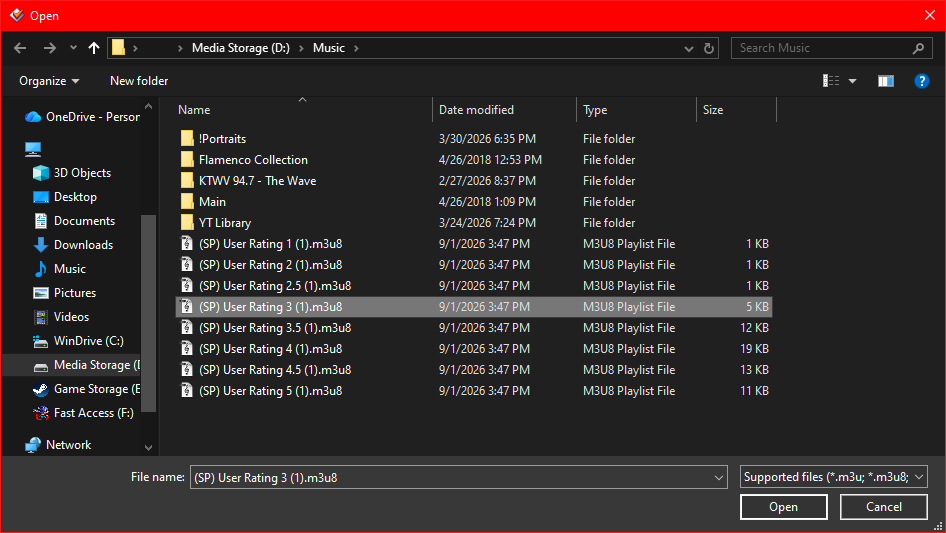
Mp3tag will now go through your library and open up only the tracks listed in the *.m3u8 file. In other words, it will open only the tracks which should be given the matching rating.
Once it has loaded the track list, go ahead and Select All of the tracks. (Click any one of the tracks in the list, and then press CTRL + A )
With everything highlighted, we can now navigate to Actions → Actions (Quick)

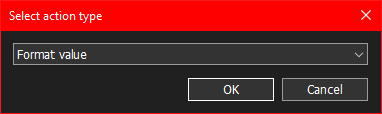
Then select Format value
Type RATING into the Field box and the value into the Format string box.
Values here range from 0 to 100, with every half-star equal to 10. I selected my 3-star rating playlist, so I should set the value to 60
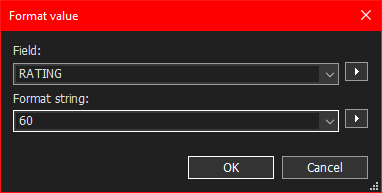
Click OK and let the software do its thing. Repeat with all of the remaining *.m3u8 files.
Ta-da! Your track ratings from Symfonium should now be saved in each track’s metadata! 
As long as you keep the Smart Playlists from the first step, the next time you want to export your ratings you can skip straight to Step 2.